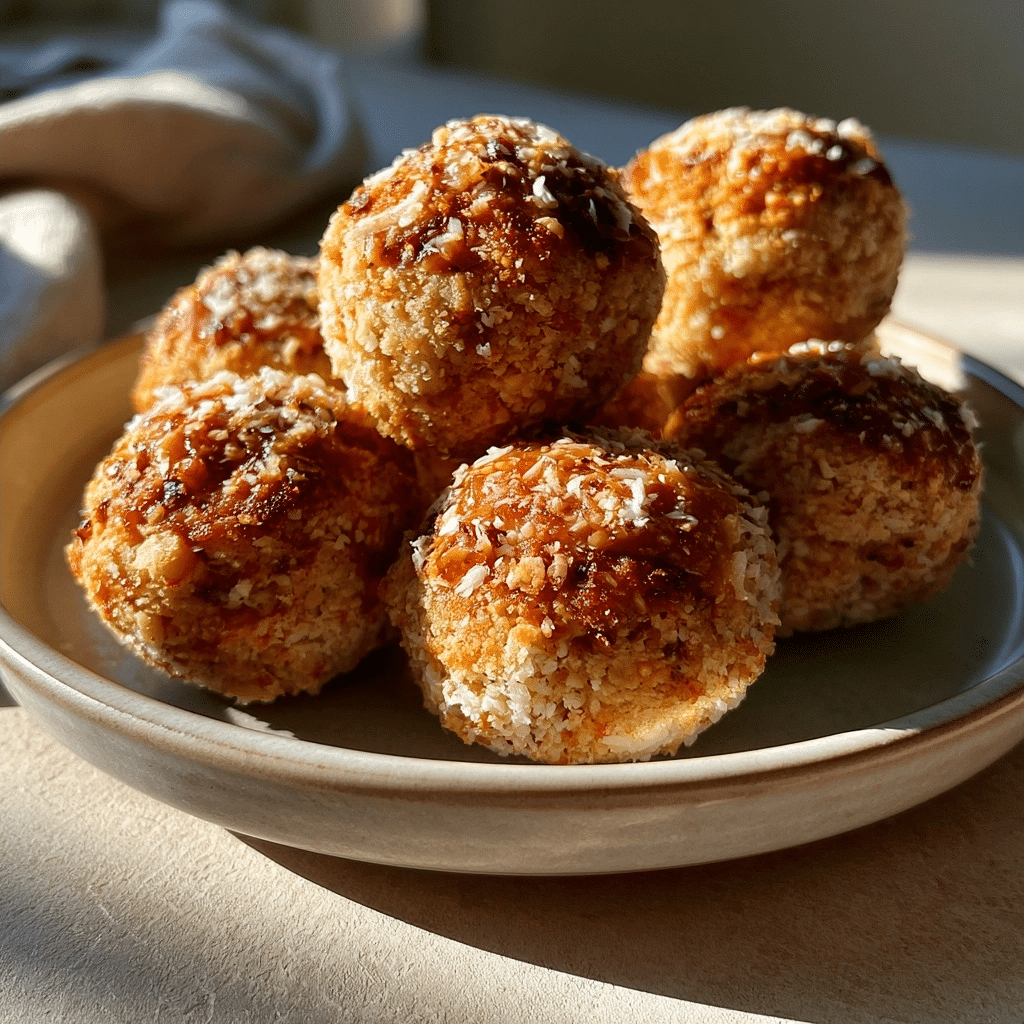
Peanut Butter Balls are a classic no-bake dessert that combines creamy peanut butter with powdered sugar and butter, coated in chocolate. These rich, bite-sized treats are perfect for parties, holiday cookie trays, or a quick homemade candy fix. With just a few simple ingredients and no oven required, you can have a batch ready in under an hour.
| Prep Time | Cook Time | Total Time | Servings | Difficulty | Cuisine |
|---|---|---|---|---|---|
| 20 minutes | 0 minutes | 1 hour (including chilling) | 24 balls | Easy | American |
Why This Recipe Works
I have made Peanut Butter Balls for every holiday season for over a decade. The combination of rich, creamy peanut butter with a smooth chocolate shell never fails to impress. The key is the perfect balance of sweetness and saltiness, plus the easy no-bake method means no melted chocolate seizing in the oven.
The texture is soft and fudge-like when chilled, with a satisfying snap from the chocolate coating. This recipe uses simple pantry staples and comes together quickly. Once you try it, you will understand why these are a perennial favorite at potlucks and bake sales.
Using high-quality peanut butter without added sugar or hydrogenated oils makes a noticeable difference. The natural oils help the mixture hold together without being greasy.
Ingredients
| Ingredient | Quantity | Notes |
|---|---|---|
| Peanut butter (creamy) | 1 cup | Use natural peanut butter for best flavor; avoid reduced-fat. |
| Unsalted butter, softened | 1/2 cup (1 stick) | Substitute with vegan butter for dairy-free. |
| Powdered sugar | 2 cups | Sift to remove lumps. |
| Vanilla extract | 1 tsp | Use alcohol-free vanilla extract if desired. |
| Salt | 1/4 tsp | Omit if peanut butter is salted. |
| Chocolate chips (semisweet) | 2 cups | Use dairy-free chips if needed. |
| Coconut oil (optional) | 1 tbsp | Helps thin the chocolate for easier dipping. |
Step-by-Step Instructions
Phase 1: Make the Peanut Butter Filling
- In a large bowl, beat together peanut butter and softened butter until smooth and creamy.
- Gradually add powdered sugar, one cup at a time, mixing on low speed after each addition until combined.
- Add vanilla extract and salt (if using) and mix until a stiff dough forms. The mixture should hold together when pinched.
- Cover the bowl and refrigerate for at least 30 minutes, or until firm enough to roll.
Phase 2: Shape and Chill
- Line a baking sheet with parchment paper or wax paper.
- Scoop about 1 tablespoon of the chilled dough and roll into a smooth ball between your palms. Place on the prepared sheet.
- Repeat with remaining dough, spacing balls about 1 inch apart. You should have 24 balls.
- Refrigerate the shaped balls for another 15–20 minutes while you prepare the chocolate coating.
Phase 3: Dip in Chocolate
- In a microwave-safe bowl, combine chocolate chips and coconut oil (if using). Microwave in 30-second bursts, stirring after each, until completely melted and smooth.
- Using a fork or dipping tool, submerge one peanut butter ball into the melted chocolate. Lift and let excess chocolate drip off.
- Place the coated ball back on the parchment paper. Repeat with all balls.
- If desired, drizzle any remaining chocolate over the tops or sprinkle with flaky salt or chopped peanuts.
- Refrigerate until chocolate is set, about 15 minutes. Serve chilled or at room temperature.
Chef Tips for Perfect Results
- Chill thoroughly: Do not skip the chilling steps. The filling must be cold enough to hold shape during dipping, or it will fall apart in the warm chocolate.
- Use a toothpick or fork for dipping: Skewer the ball with a toothpick to dip fully, then slide it off gently. Alternatively, use a two-fork method to avoid fingerprints.
- Temper the chocolate: For a glossy, snappy shell, use tempered chocolate or add a tablespoon of coconut oil to the chips for a softer sheen.
- Work in small batches: Keep the undipped balls in the fridge until you are ready to coat them. This prevents them from warming up and becoming sticky.
- Add flavor twists: Mix in 1/4 cup of finely chopped peanuts or a tablespoon of cocoa powder to the filling for variety.
- Drip control: Tap the fork gently on the side of the bowl to remove excess chocolate before placing the ball on the paper; this prevents puddling.
Common Mistakes to Avoid
- Using oily peanut butter: If the peanut butter separates too much, the balls may be greasy and crumble. Stir well or choose a no-stir brand. Fix by adding extra powdered sugar to achieve a firm dough.
- Over-melting chocolate: Heating chocolate too quickly causes it to seize. Always use low power and stir frequently. If chocolate seizes, add a teaspoon of coconut oil and stir vigorously.
- Warm hands when rolling: Warmth from your hands will soften the filling. If it becomes sticky, return the mixture to the fridge for 10 minutes before continuing.
- Not sifting powdered sugar: Lumps in the sugar create gritty balls. Always sift to ensure a smooth, creamy texture.
- Skipping the salt: A pinch of salt balances the sweetness and enhances the peanut flavor. Without it, the balls can taste flat.
Variations and Substitutions
| Ingredient | Substitution | Impact on Flavor |
|---|---|---|
| Peanut butter | Almond butter or sunflower seed butter | Milder, nuttier flavor; adjust sweetness accordingly. |
| Butter | Coconut oil or vegan butter | More coconut undertone, slightly firmer texture. |
| Powdered sugar | Powdered erythritol or monk fruit sweetener | Lower sugar option; may be less sweet and slightly granular. |
| Semisweet chocolate | Dark chocolate (70%+) or white chocolate | Dark chocolate adds bitterness; white chocolate is sweeter and milder. |
| Vanilla extract | Maple syrup (reduce powdered sugar by 2 tbsp) | Adds maple notes; mixture might be softer. |
Serving Suggestions and Pairings
Serve Peanut Butter Balls on a festive platter for holiday gatherings, cookie exchanges, or birthday parties. They pair beautifully with a glass of cold milk, a warm cup of coffee, or a tall glass of iced tea. For a dessert board, arrange them alongside fresh strawberries, pretzels, and cheese cubes. These balls also make excellent homemade gifts when packed in a decorative tin lined with wax paper.
Storage and Reheating
| Method | Duration | Instructions |
|---|---|---|
| Refrigerator | Up to 2 weeks | Store in an airtight container with parchment between layers. |
| Freezer | Up to 3 months | Place in a freezer-safe bag or container. Thaw in fridge overnight. |
| Room temperature | 3–4 days | Keep in a cool, dry place away from heat; chocolate may soften. |
No reheating needed – serve chilled or at room temperature. If chocolate coating becomes dull, a quick 10-second microwave burst (on a plate) can revive the sheen.
Nutritional Information
| Nutrient | Amount per Serving (1 ball) |
|---|---|
| Calories | 180 |
| Protein | 5g |
| Fat | 12g |
| Carbohydrates | 16g |
| Fiber | 1g |
| Sugar | 12g |
| Sodium | 60mg |
Approximate values. Actual nutrition depends on specific brands and substitutions.
Frequently Asked Questions
Can I make Peanut Butter Balls without butter?
Yes, substitute the butter with an equal amount of coconut oil or vegan butter. The texture will be slightly firmer, but the flavor remains delicious. Let the dough chill longer to ensure proper shaping.
How do I know when the filling is the right consistency?
The filling should be stiff enough to roll into a ball without cracking. If it is too dry, add a teaspoon of milk or extra peanut butter. If too sticky, refrigerate for 15 more minutes or add a tablespoon of powdered sugar.
Why did my chocolate coating crack?
Cracking usually happens when the filling is too cold when dipped. Let the balls sit at room temperature for 5 minutes before coating. Also, ensure the chocolate is not overheated, as that can cause brittleness.
Can I make these ahead for a party?
Absolutely. Peanut Butter Balls can be made up to two weeks in advance and stored in the refrigerator. For best texture, add the chocolate coating no more than one week before serving. Freeze for longer storage.
How should I serve Peanut Butter Balls for a crowd?
Arrange them on a platter with tiny cupcake liners for easy grabbing. Serve slightly chilled so the chocolate stays firm. Pair with other no-bake sweets like truffles or energy balls.
Conclusion
These Peanut Butter Balls are a timeless treat that bring joy to any occasion. With a creamy, peanutty center encased in a crisp chocolate shell, each bite delivers pure satisfaction. The simple no-bake process makes them accessible to bakers of all skill levels. Whether you enjoy them as a festive holiday candy or a weekday sweet, the signature flavor of peanut butter and chocolate will always win hearts. Make a batch today and taste the magic.
PrintPeanut Butter Balls: The Ultimate No-Bake Treat

These no-bake peanut butter balls blend creamy peanut butter, powdered sugar, and butter into a fudgy center, coated in a smooth semisweet chocolate shell. Perfect for parties, holidays, or a quick homemade candy fix, they require minimal effort and are ready in an hour (including chilling). With a balance of sweetness and saltiness, they offer a classic American dessert in bite-sized form.
- Prep Time: 20
- Total Time: 60
- Yield: 24 balls
- Category: recipe index
- Method: No-Bake
- Cuisine: American
- Diet: Vegetarian
Ingredients
Peanut butter (creamy)
Unsalted butter, softened
Powdered sugar
Vanilla extract (alcohol-free)
Salt
Semisweet chocolate chips (dairy-free optional)
Coconut oil (optional)
Instructions
Beat peanut butter and butter until smooth
Gradually add powdered sugar, mixing on low after each cup
Stir in vanilla extract and salt until stiff dough forms
Refrigerate for 30 minutes until firm
Line a baking sheet with parchment paper
Scoop 1 tablespoon of dough and roll into balls
Place balls on the baking sheet and refrigerate for 30 minutes more
Microwave chocolate chips and coconut oil (if using) until melted
Dip each ball into melted chocolate, let excess drip off, and set back on baking sheet
Refrigerate until chocolate hardens before serving
Notes
Use a fork to roll dough if it’s too sticky
For vegan version, substitute butter and chocolate chips with dairy-free alternatives
Storing in an airtight container keeps them fresh for 1 week
Add chopped nuts or sprinkles to the dough for extra texture