
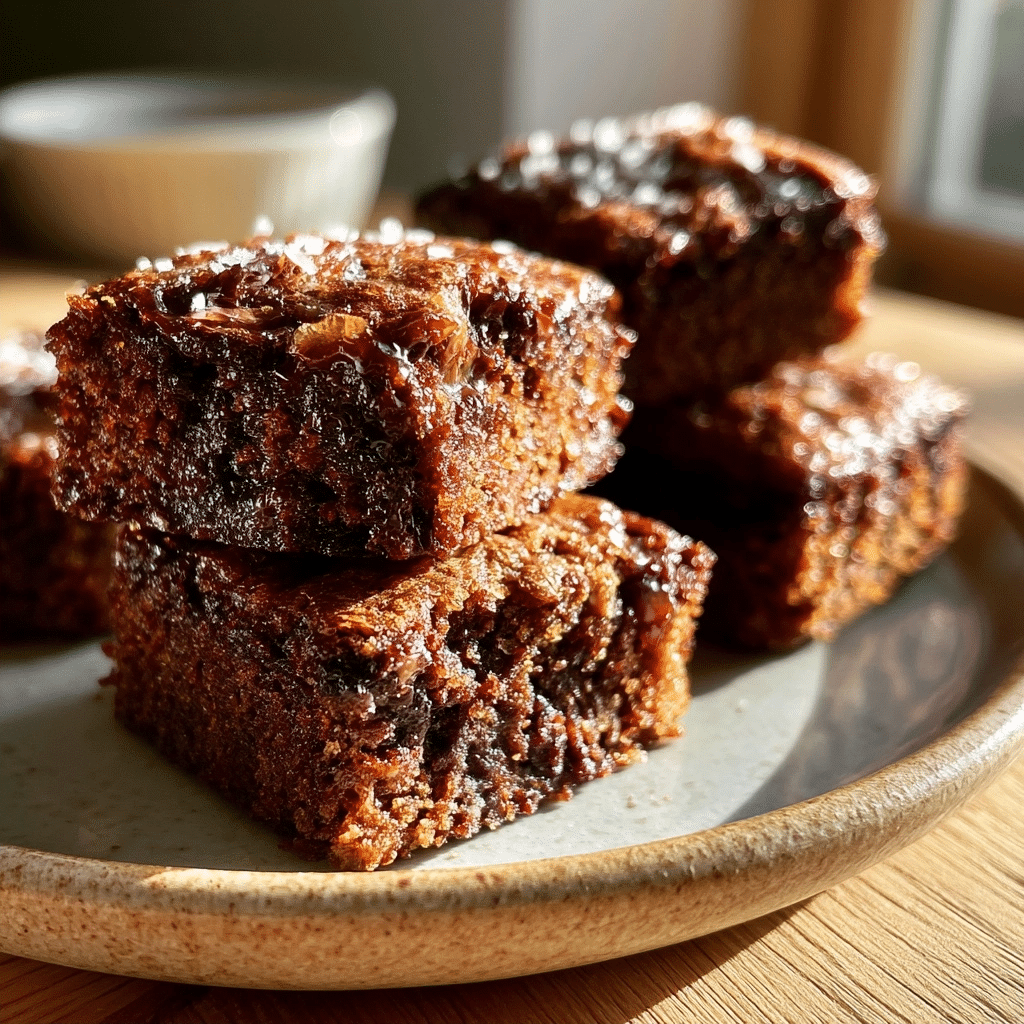
Lunchbox brownie bites are dense, fudgy, and perfectly portioned chocolate treats designed specifically for convenient snacking throughout the school or work day. These miniature delights offer a rich cocoa profile that satisfies sweet cravings without the mess of traditional, full-sized brownies. Because they are baked in uniform mini-muffin tins, every single bite features those coveted crisp edges everyone loves. Experience consistent quality and portable indulgence with this simple, reliable recipe.
Recipe Overview
| Metric | Details |
|---|---|
| Prep Time | 15 minutes |
| Cook Time | 12 minutes |
| Total Time | 27 minutes |
| Servings | 24 bites |
| Difficulty | Easy |
| Cuisine | American |
Why This Recipe Works
This recipe works because it relies on the science of ratios to ensure a soft, fudgy center despite the small size. I have spent years testing different cocoa-to-butter proportions, and this specific blend delivers a professional-grade brownie texture that remains moist for days when stored in an airtight container.
My personal experience with these treats confirms their necessity in any busy household’s snack rotation. They are incredibly versatile for lunchboxes, providing a homemade alternative to processed snacks. You can easily scale this batch up for parties or freeze them for weeks, saving precious time on busy mornings while ensuring everyone gets a high-quality, chocolatey treat.
Ingredients
| Ingredient | Quantity | Notes |
|---|---|---|
| All-Purpose Flour | 1/2 Cup | Measure by leveling |
| Cocoa Powder | 1/2 Cup | Dutch-process for deeper flavor |
| Butter | 1/2 Cup | Melted and cooled |
| Granulated Sugar | 1 Cup | Can use coconut sugar |
| Eggs | 2 Large | Room temperature |
| Vanilla Extract | 1 tsp | Pure extract adds depth |
| Salt | 1/4 tsp | Enhances chocolate intensity |
Step-by-Step Instructions
Preparation and Mixing
- Preheat your oven to 350°F and grease a mini-muffin tin thoroughly with butter or non-stick spray.
- Whisk the melted butter, granulated sugar, and vanilla extract in a large bowl until smooth.
- Beat in the eggs one at a time, ensuring each is fully incorporated before adding the next.
- Combine the flour, cocoa powder, and salt in a separate bowl to remove all lumps.
- Fold the dry ingredients into the butter mixture until just combined, being careful not to overmix to maintain fudginess.
Baking
- Scoop the brownie batter evenly into the prepared mini-muffin tin compartments.
- Bake for 12 to 14 minutes, or until a toothpick inserted into the center comes out with moist crumbs.
- Cool the brownies inside the tin for 10 minutes to allow them to set for a perfect bite.
- Remove the bites onto a wire rack to cool completely before packing into lunchboxes.
Chef Tips for Perfect Results
- Use high-quality Dutch-processed cocoa powder to ensure your lunchbox brownie bites have a deep, dark color and refined taste.
- Do not overbake your brownie bites, as their smaller size means they set very quickly; start checking at the 11-minute mark.
- Use a small cookie scoop to portion the batter into the muffin tin to ensure every brownie is uniform and cooks evenly.
- Line your mini-muffin tins with small parchment paper liners or ensure professional-grade greasing to prevent the delicate edges from sticking.
- Allow the brownies to reach room temperature before storage, which prevents condensation and keeps them perfectly chewy.
Common Mistakes to Avoid
Overmixing the batter is a primary concern, as it develops gluten and creates a tough, cake-like texture rather than a fudgy one. Stop folding as soon as no streaks of flour remain. Another frequent error is using cold eggs; cold ingredients can cause the melted butter to seize and result in a grainy texture. Finally, neglecting to measure flour correctly often leads to dry, dense brownies. Always use the spoon-and-level method rather than scooping directly from the container.
Variations and Substitutions
| Ingredient | Substitution | Impact on Flavor |
|---|---|---|
| Butter | Coconut oil | Adds a subtle tropical hint |
| Sugar | Maple syrup | Makes flavor more complex |
| Flour | Almond flour | Adds moisture/nuttiness |
Frequently Asked Questions
Can I substitute gluten-free flour?
You can substitute the all-purpose flour with a high-quality 1:1 gluten-free baking blend. Ensure the blend includes xanthan gum to help hold the structure of the smaller brownie bites together.
How do I know when the brownies are done?
The brownies are done when the edges appear set and a toothpick inserted into the center comes out with moist crumbs attached. If the toothpick comes out completely dry, the bites will be overcooked and crumbly.
How can I make these allergen-friendly?
You can make these bites dairy-free by substituting butter with a high-quality vegan butter stick or refined coconut oil. Always check that your cocoa powder is processed in a facility that meets your specific dietary needs.
Can I prepare the batter ahead of time?
You can prepare the batter up to 24 hours in advance and store it in an airtight container in the refrigerator. Bring the batter to room temperature for 30 minutes before scooping into the tin to ensure optimal rise.
How do I store them for a lunchbox?
Store your cooled brownie bites in an airtight container at room temperature for up to four days for maximum freshness. For longer storage, freeze them in a single layer before transferring to a freezer-safe bag for up to two months.
Homemade Lunchbox Brownie Bites Recipe
A classic, easy-to-follow recipe for the perfect school-day treat.
- Prep: 15m | Cook: 12m | Total: 27m
- Yield: 24 servings
- Calories: 110 kcal per serving
Lunchbox brownie bites are the ultimate solution for school snacks that feel indulgent yet remain practical for everyday life. By following the tips above, you can ensure a consistent, fudgy, and crowd-pleasing result every single time you bake them. Dive into your pantry, grab your cocoa, and elevate your snack game with this simple, decadent recipe today.
PrintLunchbox Brownie Bites
These mini brownie bites are the perfect bite-sized chocolate indulgence for school or work lunches. With a dense, fudgy center and crisp edges thanks to the mini-muffin tin, each bite provides a rich cocoa profile. They are portable, easy to bake, and stay moist for days in an airtight container, making them a superior homemade alternative to processed snacks.
- Prep Time: 15
- Cook Time: 12
- Total Time: 27
- Yield: 24 bites
- Category: recipe index
- Method: Baking
- Cuisine: American
- Diet: Vegetarian
Ingredients
1/2 cup all-purpose flour
1/2 cup Dutch-process cocoa powder
1/2 cup butter, melted and cooled
1 cup granulated sugar
2 large eggs, room temperature
1 tsp vanilla extract
1/4 tsp salt
Instructions
Preheat your oven to 350°F and grease a mini-muffin tin.
In a large bowl, whisk the melted butter, granulated sugar, and vanilla extract until smooth.
Beat in the eggs one at a time, ensuring each is fully incorporated.
In a separate bowl, sift together the flour, cocoa powder, and salt.
Fold the dry ingredients into the wet mixture until just combined, being careful not to overmix.
Scoop the batter evenly into the prepared mini-muffin tin.
Bake for 12 minutes or until a toothpick inserted into the center comes out with a few moist crumbs.
Notes
Use Dutch-process cocoa for a deeper, darker chocolate flavor. Ensure you don’t overmix the batter to keep the bites fudgy. These can be stored in an airtight container for up to 5 days or frozen for several weeks.