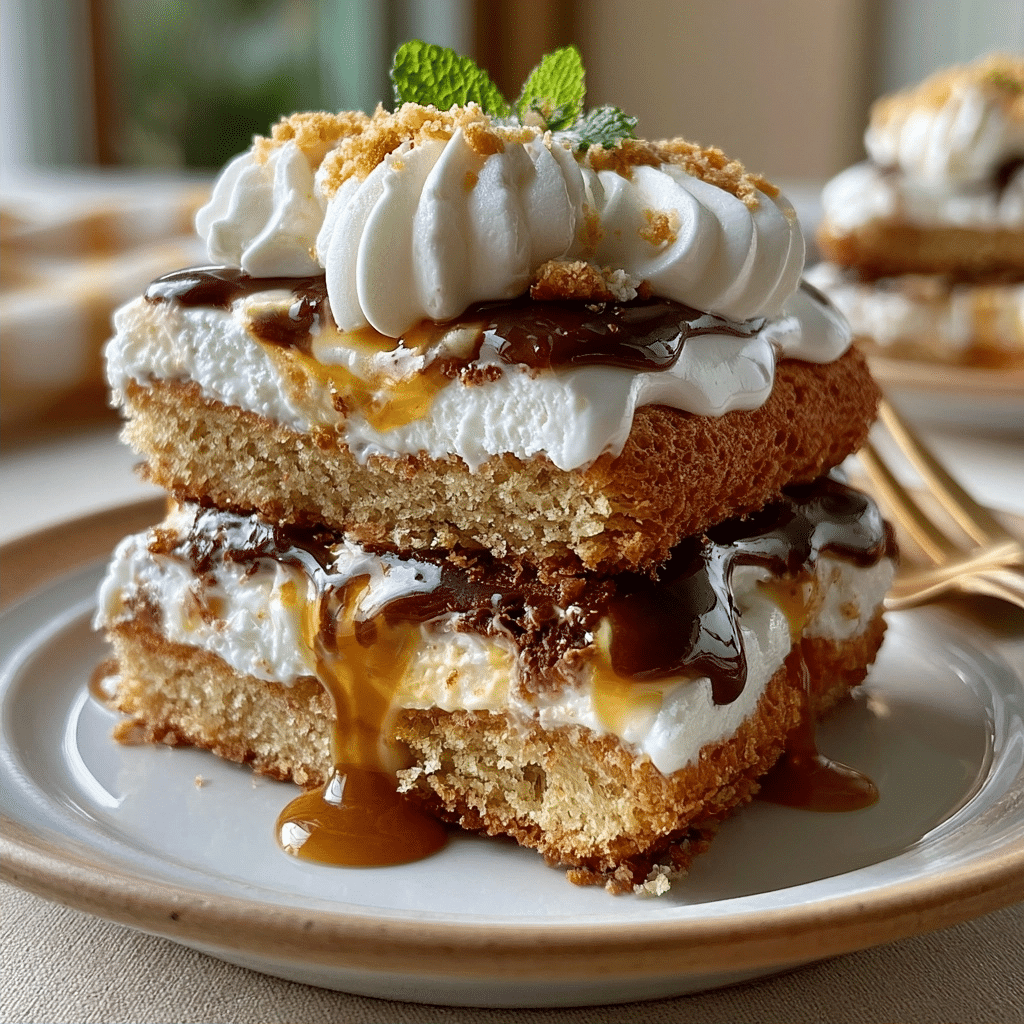
An Ice Cream Sandwich Cake is a decadent no-bake dessert made by layering vanilla ice cream sandwiches with whipped topping, fudge sauce, and your favorite mix-ins. This recipe delivers a rich, creamy, and customizable cake that comes together in minutes without turning on the oven. Perfect for birthdays, barbecues, or any warm-weather celebration.
Why This Recipe Works
I first made this Ice Cream Sandwich Cake for my son’s birthday, and it disappeared faster than any baked cake ever has. The beauty is in the simplicity: no baking, no complicated steps, and you can use whatever add-ins you have on hand.
The texture is what sets it apart. The frozen sandwiches soften just enough to meld with the creamy layers, creating a slice that’s part cake, part ice cream, and completely addictive. Plus, it’s endlessly customizable with different syrups, fruits, or candies.
Ingredients
| Ingredient | Quantity | Notes/Alternatives |
|---|---|---|
| Vanilla ice cream sandwiches (halal-certified) | 24-30 sandwiches | Use any flavor; chocolate or strawberry work well |
| Frozen whipped topping (e.g., Cool Whip), thawed | 16 oz (2 tubs) | For dairy-free, use coconut whipped cream |
| Chocolate fudge sauce | 1½ cups | Use caramel, strawberry, or butterscotch for variation |
| Crushed chocolate cookies or wafer crumbs | 1 cup | Oreo or chocolate wafers; substitute graham cracker crumbs |
Step-by-Step Instructions
Prepare the Base
- Line a 9×13-inch baking dish with parchment paper leaving overhang on two sides for easy removal.
- Arrange a single layer of ice cream sandwiches covering the bottom completely, cutting sandwiches to fill gaps.
- Spread half of the whipped topping evenly over the sandwiches.
- Drizzle half of the fudge sauce over the whipped topping.
- Sprinkle half of the crushed cookies over the sauce.
Build the Second Layer
- Add a second layer of ice cream sandwiches on top of the filling.
- Spread the remaining whipped topping over the second layer.
- Drizzle remaining fudge sauce over the top.
- Sprinkle remaining crushed cookies evenly over the cake.
Freeze and Serve
- Cover with plastic wrap and freeze for at least 6 hours or overnight.
- Let the cake sit at room temperature for 5 minutes before slicing.
- Use the parchment overhang to lift the cake out and slice with a serrated knife.
Chef Tips for Perfect Results
- Freeze the cake for a minimum of 6 hours, but overnight yields the best sliceable texture.
- Let the whipped topping thaw in the refrigerator for 2–3 hours before assembling so it spreads easily without turning runny.
- Cut the cake with a serrated knife dipped in hot water; wipe the blade between slices for clean edges.
- Press the sandwiches gently when layering to eliminate air pockets and ensure even density.
- For extra chocolate flavor, brush each sandwich with chocolate syrup before layering.
Common Mistakes to Avoid
- Using frozen whipped topping directly from the freezer: It will be too stiff to spread and tear the sandwiches. Always thaw completely.
- Overcrowding the dish with too many sandwiches: This creates a dense, icy cake. Leave slight gaps so layers can meld.
- Skipping the parchment overhang: The cake is slippery when frozen; parchment makes removal effortless.
- Cutting the cake straight from the freezer: The ice cream will crack. Let it soften for 5 minutes at room temperature.
Variations and Substitutions
| Ingredient | Substitution | Impact on Flavor |
|---|---|---|
| Vanilla ice cream sandwiches | Chocolate or strawberry sandwiches | Changes base flavor; chocolate makes a richer cake |
| Frozen whipped topping | Vanilla Greek yogurt (drained) | Adds tanginess, reduces sweetness |
| Chocolate fudge sauce | Caramel or butterscotch sauce | Creates a buttery, less chocolatey cake |
| Crushed cookies | Chopped nuts or sprinkles | Adds crunch and a different texture |
Serving Suggestions and Pairings
This Ice Cream Sandwich Cake is perfect for summer birthday parties, poolside gatherings, or Fourth of July celebrations. Slice it into squares and serve with fresh berries or a drizzle of extra fudge. For a complete dessert spread, pair with brownies or a fruit tart.
Storage and Reheating
| Method | Duration | Instructions |
|---|---|---|
| Freezer (uncut) | Up to 2 months | Cover tightly with plastic wrap then foil to prevent freezer burn |
| Freezer (individual slices) | Up to 1 month | Wrap each slice in plastic wrap, then store in an airtight container |
Nutritional Information
Approximate values per serving (1/12 of cake).
| Nutrient | Amount per Serving |
|---|---|
| Calories | 320 |
| Total Fat | 18g |
| Carbohydrates | 38g |
| Protein | 4g |
| Sugar | 26g |
| Sodium | 180mg |
Frequently Asked Questions
Can I use homemade ice cream sandwiches instead of store-bought?
Yes, you can substitute homemade vanilla or chocolate ice cream sandwiches. The texture will be slightly softer, so freeze the assembled cake for at least 8 hours.
How do I prevent the cake from becoming icy and hard?
Thaw the whipped topping completely and avoid over-freezing. Serve after 6–24 hours of freezing; after 48 hours, let the cake sit for 10 minutes at room temperature.
Can I make this cake dairy-free?
Yes, use dairy-free ice cream sandwiches, coconut whipped cream, and a dairy-free fudge sauce. Check labels for certification.
How far in advance can I assemble the cake?
Assemble up to two days before serving for best texture. For longer storage, wrap tightly and freeze up to two months.
What’s the best way to serve leftover cake?
Let leftover slices sit at room temperature for 3–5 minutes to soften slightly before eating. Store leftovers in the freezer in an airtight container.
Conclusion
This Ice Cream Sandwich Cake delivers layers of creamy, chocolatey goodness with minimal effort. Whether you’re hosting a summer party or simply craving a cool treat, this no-bake dessert never disappoints. Customize it with your favorite toppings and enjoy the signature blend of soft ice cream, fudge, and crunch.
PrintIce Cream Sandwich Cake
A no-bake, customizable dessert layered with vanilla ice cream sandwiches, whipped topping, fudge sauce, and crunchy toppings. Perfect for summer gatherings or quick festive treats.
- Prep Time: 15
- Total Time: 15
- Yield: 24 servings
- Method: No-bake
- Cuisine: American
- Diet: Vegetarian
Ingredients
Vanilla ice cream sandwiches (halal-certified), 24-30 sandwiches
Frozen whipped topping (e.g., Cool Whip), 16 oz (2 tubs)
Chocolate fudge sauce, 1½ cups
Crushed chocolate cookies or wafer crumbs, 1 cup
Instructions
1. Line a 9×13-inch baking dish with parchment paper.
2. Arrange a single layer of ice cream sandwiches, cutting as needed to fill gaps.
3. Spread half the whipped topping evenly over the sandwiches.
4. Drizzle half the fudge sauce over the whipped topping.
5. Sprinkle half the crushed cookies over the sauce.
6. Add a second layer of ice cream sandwiches.
7. Spread the remaining whipped topping over the second layer.
8. Drizzle the remaining fudge sauce over the top.
9. Sprinkle the remaining crushed cookies evenly.
10. Cover and freeze for at least 6 hours or overnight.
11. Let sit at room temperature for 5 minutes before slicing.
12. Use parchment overhang to lift the cake and slice with a serrated knife.
Notes
For dairy-free, substitute coconut whipped cream.
Customize fudge sauce with caramel, strawberry, or butterscotch.
Sprinkle optional mix-ins like chocolate chips, chopped nuts, or fruit slices.
Crushed graham crackers can replace chocolate cookies for dietary adjustments.