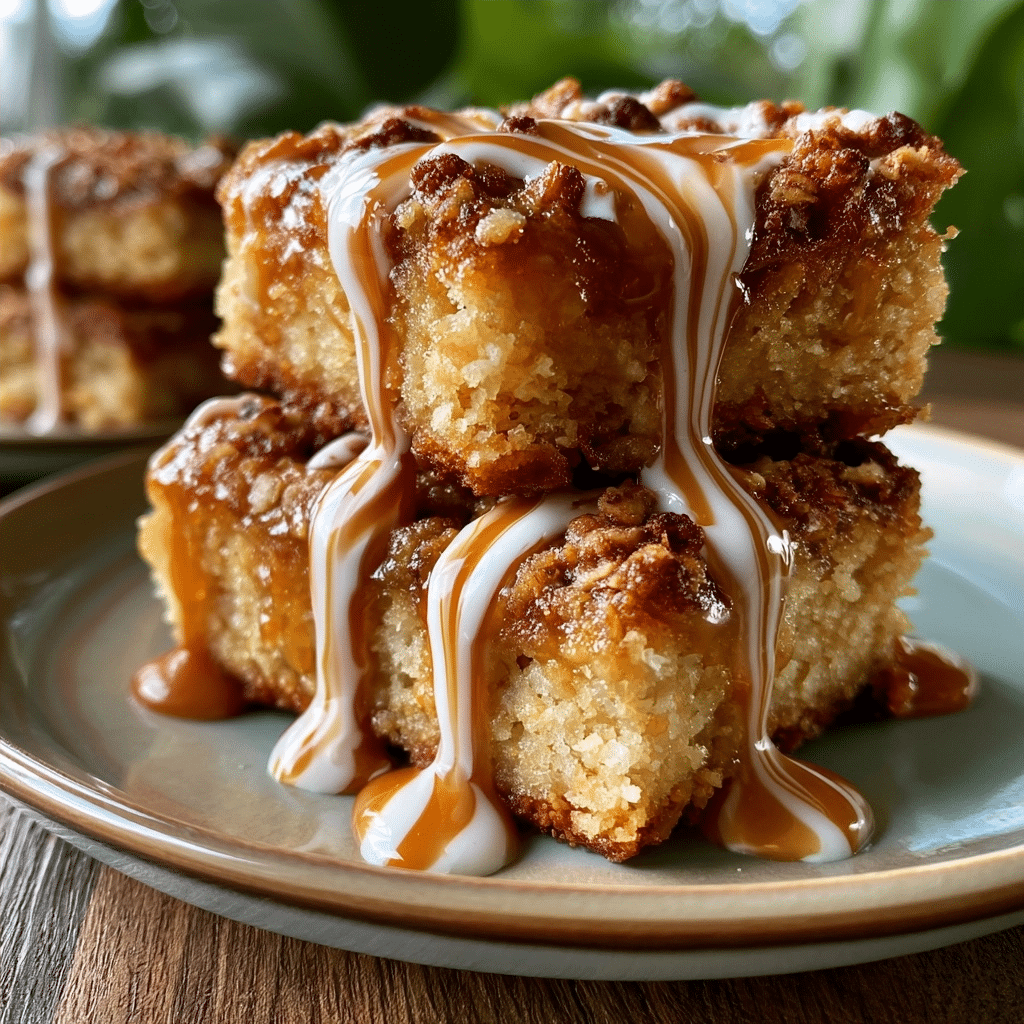
Caramel Apple Bars constitute a quintessential autumn treat featuring a buttery shortbread crust layered with fresh, cinnamon-spiked apple slices and a rich, gooey caramel drizzle. This recipe provides a structured approach to balancing tart fruit with sweet, caramelized sugar for a perfect balance of textures in every bite. Follow these precise steps to create a show-stopping dessert that captures the comfort of fall harvest flavors in an easy-to-slice square format.
Recipe Overview
| Prep Time | 20 minutes |
|---|---|
| Cook Time | 45 minutes |
| Total Time | 1 hour 5 minutes |
| Servings | 16 bars |
| Difficulty | Easy |
| Cuisine | American |
Why This Recipe Works
This recipe works because it relies on the science of moisture control, ensuring that the fruit releases just enough juice to flavor the crust without making it soggy. By par-baking the base layer before adding the apples, we create a distinct barrier that maintains a satisfying crunch even when topped with chewy, melted caramel.
I personally experimented with various apple varieties to ensure the texture holds up through the baking process. Honeycrisp or Granny Smith apples remain firm under heat, preventing the mushy consistency that often plagues fruit bars. The result is a robust, well-structured bar that serves beautifully at parties or casual family gatherings.
Ingredients
| Ingredient | Quantity | Notes |
|---|---|---|
| All-purpose flour | 2 cups | Base structure |
| Unsalted butter | 1 cup | Cold, cubed |
| Granulated sugar | 1/2 cup | Sweetness for crust |
| Granny Smith apples | 4 large | Peeled and diced |
| Brown sugar | 1/4 cup | Depth of flavor |
| Ground cinnamon | 1 tbsp | Warm aromatics |
| Caramel sauce | 1/2 cup | Use thick store-bought or homemade |
Step-by-Step Instructions
Preparing the Base
- Preheat your oven to 350°F and grease a 9×9 inch square baking pan with parchment paper.
- Mix the flour and granulated sugar in a large bowl.
- Cut the cold butter into the flour mixture using a pastry cutter until it resembles coarse crumbs.
- Press two-thirds of the dough into the bottom of the prepared pan firmly.
- Bake the crust for 15 minutes until set, then remove from the oven.
Assembling the Filling
- Toss the diced apples with cinnamon and brown sugar in a medium bowl until thoroughly coated.
- Spread the apple mixture evenly over the pre-baked crust.
- Crumble the remaining dough mixture over the top of the apples.
- Bake for 30 minutes until the apples are tender and the topping is golden brown.
- Drizzle the caramel sauce generously over the top immediately after taking the pan out of the oven.
Chef Tips for Perfect Results
- Use cold, cubed butter for the crust to ensure crumbly layers instead of a dense cake-like consistency.
- Peel your apples uniformly to ensure every bite has the same softness level.
- Allow the bars to cool completely to room temperature before slicing to achieve clean, sharp edges.
- Line your pan with excess parchment paper hanging over the edges for easy removal.
Common Mistakes to Avoid
- Over-baking the apples leads to a soup-like center instead of a set bar.
- Using room-temperature butter results in a greasy base instead of a crumbly shortbread texture.
- Adding the caramel while the bars are still in the oven ruins the viscosity; always add it as the final finish.
- Skipping the cooling time causes the bars to fall apart when you attempt to slice them.
Variations and Substitutions
| Ingredient | Substitution | Impact |
|---|---|---|
| Granny Smith | Gala or Fuji | Sweeter, softer texture |
| Caramel Sauce | Maple syrup reduction | Earthier, less sticky finish |
| All-purpose flour | Oat flour | Nutty flavor, gluten-free option |
Frequently Asked Questions
Can I make these bars ahead of time?
You can prepare these bars up to two days in advance for best results. Store them in an airtight container at room temperature to keep the crust crisp.
How do I know when the apples are done?
The apples are done when a fork inserted into the center of the pan slides through them with no resistance. You should also notice the edges of the topping turning deep golden brown.
Why did my bars turn out soggy?
Soggy bars usually occur when the crust is not pre-baked enough or the apples have too much moisture. Ensure you dice the apples consistently and drain any excess liquid before layering.
PrintCaramel Apple Bars
These decadent Caramel Apple Bars are the ultimate autumn treat, featuring a buttery, crisp shortbread base topped with spiced Granny Smith apples and a rich, gooey caramel drizzle. Designed for perfection, this recipe uses a par-baking technique to ensure the crust remains satisfyingly crunchy beneath the tender, cinnamon-sweetened fruit layer. Easy to slice and serve, these bars deliver comfort in every bite.
- Prep Time: 20
- Cook Time: 45
- Total Time: 65
- Yield: 16 bars
- Category: recipe index
- Method: Baking
- Cuisine: American
- Diet: Vegetarian
Ingredients
2 cups all-purpose flour
1 cup unsalted butter, cold and cubed
1/2 cup granulated sugar
4 large Granny Smith apples, peeled and diced
1/4 cup brown sugar
1 tbsp ground cinnamon
1/2 cup caramel sauce
Instructions
Preheat your oven to 350°F and grease a 9×9 inch square baking pan with parchment paper.
In a large bowl, mix the flour and granulated sugar.
Cut the cold butter into the flour mixture using a pastry cutter until it resembles coarse crumbs.
Press two-thirds of the dough into the bottom of the prepared pan firmly.
Bake the crust for 15 minutes until set, then remove from the oven.
In a medium bowl, toss the diced apples with cinnamon and brown sugar until thoroughly coated.
Spread the apple mixture evenly over the pre-baked crust.
Crumble the remaining dough mixture over the top of the apples.
Bake for 30 minutes until the topping is golden brown.
Remove from the oven and immediately drizzle the caramel sauce over the top.
Notes
Use firm apple varieties like Honeycrisp or Granny Smith to ensure the filling stays structured. Store in an airtight container at room temperature for up to 3 days or refrigerate for longer storage.