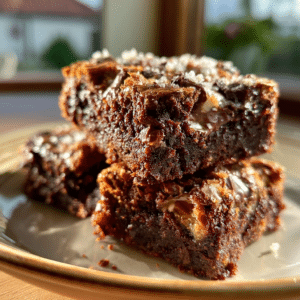
These No-Bake S’mores Bars capture the classic campfire flavor without needing an oven or grill. This simple layered dessert combines crunchy graham crackers, rich melted chocolate, and soft marshmallows into perfect handheld squares. No-Bake S’mores Bars are a safe, fast, and foolproof treat that delivers authentic s’mores taste every single time.
| Prep Time | 10 minutes |
|---|---|
| Cook Time | 5 minutes (setting) |
| Total Time | 15 minutes |
| Servings | 12-16 bars |
| Difficulty | Easy |
| Cuisine | American |
Why This Recipe Works
This No-Bake S’mores Bars recipe works because it eliminates the biggest challenge of traditional s’mores: the melty, messy cleanup. I developed this method after countless failed attempts with gooey marshmallows that refused to set properly. The secret lies in using a double boiler for gentle chocolate melting, which prevents scorching and ensures silky-smooth layers.
The combination of room-temperature ingredients creates perfect cohesion without heat. Unlike baked versions that dry out marshmallows, these bars stay soft and chewy for days. The recipe also scales beautifully for large gatherings or picnic baskets, making it a versatile staple in my dessert rotation.
Ingredients
| Ingredient | Quantity | Notes |
|---|---|---|
| Graham crackers | 12-15 full sheets | Honey or cinnamon flavor; broken into pieces |
| Butter (unsalted) | 1/2 cup (1 stick) | Use unsalted to control overall saltiness |
| Marshmallows | 4 cups (mini) | Jumbo marshmallows work but need more time |
| Chocolate chips (semi-sweet) | 2 cups | Milk or dark chocolate; avoid white for traditional taste |
| Vanilla extract | 1 teaspoon | Optional; enhances sweetness |
Step-by-Step Instructions
Prepare the Base
- Line a 9×13-inch baking pan with parchment paper, leaving overhang for easy removal.
- Crush graham crackers into coarse crumbs using a rolling pin or food processor.
- Melt butter in a small saucepan over low heat until fully liquefied.
- Mix melted butter with graham cracker crumbs until evenly moistened.
- Press the mixture firmly into the prepared pan using a flat-bottomed glass.
Create the Chocolate Layer
- Melt chocolate chips in a double boiler or microwave in 30-second intervals.
- Stir chocolate until smooth and glossy, then add vanilla extract.
- Pour half the chocolate over the pressed graham cracker base.
- Spread evenly with a rubber spatula, reserving remaining chocolate for topping.
Add the Marshmallow Topping
- Scatter mini marshmallows evenly over the chocolate layer.
- Pour remaining warm chocolate over marshmallows in a drizzling pattern.
- Gently press marshmallows into chocolate with a spatula.
- Cover pan with plastic wrap and refrigerate for at least 2 hours.
- Once set, lift bars using parchment paper and slice into squares.
Chef Tips for Perfect Results
- Use room-temperature marshmallows: Cold marshmallows cause chocolate to seize and create lumps.
- Press the crust with even pressure: Uneven bases lead to crumbly bars that fall apart.
- Let chocolate cool slightly before pouring: Hot chocolate melts marshmallows completely, ruining the texture.
- Refrigerate for exactly 2 hours: Less time results in sticky bars; more time creates clean, sharp edges.
- Slice with a hot knife: Dip knife in boiling water between cuts for straight, clean edges.
Common Mistakes to Avoid
- Overheating the chocolate: Burnt chocolate becomes gritty and bitter. Always melt with low heat.
- Adding too many marshmallows: Excess marshmallows prevent the chocolate from binding, resulting in messy bars.
- Skipping the parchment paper: Bars stick permanently to metal pans, making removal impossible without breaking.
- Using stale graham crackers: Stale crackers turn soggy and lose the essential crunch.
Variations and Substitutions
| Ingredient | Substitution | Impact on Flavor |
|---|---|---|
| Graham crackers | Chocolate wafers or shortbread | Darker, more intense chocolate flavor |
| Butter | Coconut oil (refined) | Light coconut note; dairy-free option |
| Marshmallows | Meringue drops | Lighter, airier texture |
| Semi-sweet chocolate | Dark chocolate (70%) | Bolder, less sweet taste |
Serving Suggestions and Pairings
Serve these No-Bake S’mores Bars at room temperature for the best texture—cold bars are too firm. Pair them with a tall glass of cold milk or a scoop of vanilla bean ice cream. These bars shine at summer barbecues, birthday parties, or as a make-ahead dessert for camping trips. They also make excellent lunchbox treats, staying perfect for up to three days in the refrigerator.
Storage and Reheating
| Method | Duration | Instructions |
|---|---|---|
| Refrigerator | 5-7 days | Wrap tightly in plastic wrap or store in an airtight container |
| Freezer | 3 months | Layer with wax paper between bars to prevent sticking |
| Reheating | 10 seconds | Microwave single bar for 10 seconds to soften |
Nutritional Information
Approximate values per serving (1 bar)
| Nutrient | Amount |
|---|---|
| Calories | 280 |
| Total Fat | 14g |
| Saturated Fat | 8g |
| Cholesterol | 15mg |
| Sodium | 120mg |
| Carbohydrates | 36g |
| Fiber | 2g |
| Sugar | 24g |
| Protein | 3g |
Frequently Asked Questions
Can I use chocolate bars instead of chips?
Yes, but chop chocolate bars into small pieces first to ensure even melting. Chocolate chips have stabilizers that melt more smoothly.
How do I know when the bars are set?
The bars are ready when the top feels firm and the chocolate no longer sticks to your finger. Refrigerate for 2 hours as a baseline.
Why are my bars falling apart?
This happens when the graham cracker layer isn’t pressed firmly enough. Use a flat-bottomed glass to compact the base thoroughly.
Can I make these bars a day ahead?
Absolutely. These No-Bake S’mores Bars actually improve after 24 hours in the refrigerator as flavors meld together.
What’s the best way to serve these bars?
Let the bars sit at room temperature for 10 minutes before serving. This softens the chocolate and marshmallows to the perfect consistency.
Conclusion
These No-Bake S’mores Bars prove that you don’t need a campfire or an oven to enjoy classic campfire flavors. The combination of crunchy graham crackers, smooth chocolate, and fluffy marshmallows creates a dessert that’s both nostalgic and innovative. Whether for a last-minute summer party or a weeknight treat, this recipe delivers consistent results that will have everyone asking for seconds. The signature taste of these bars—pure, sweet, and utterly satisfying—makes them an instant classic in your dessert repertoire.
Recipe adapted from AllRecipes and Bon Appétit.
PrintNo-Bake S’mores Bars

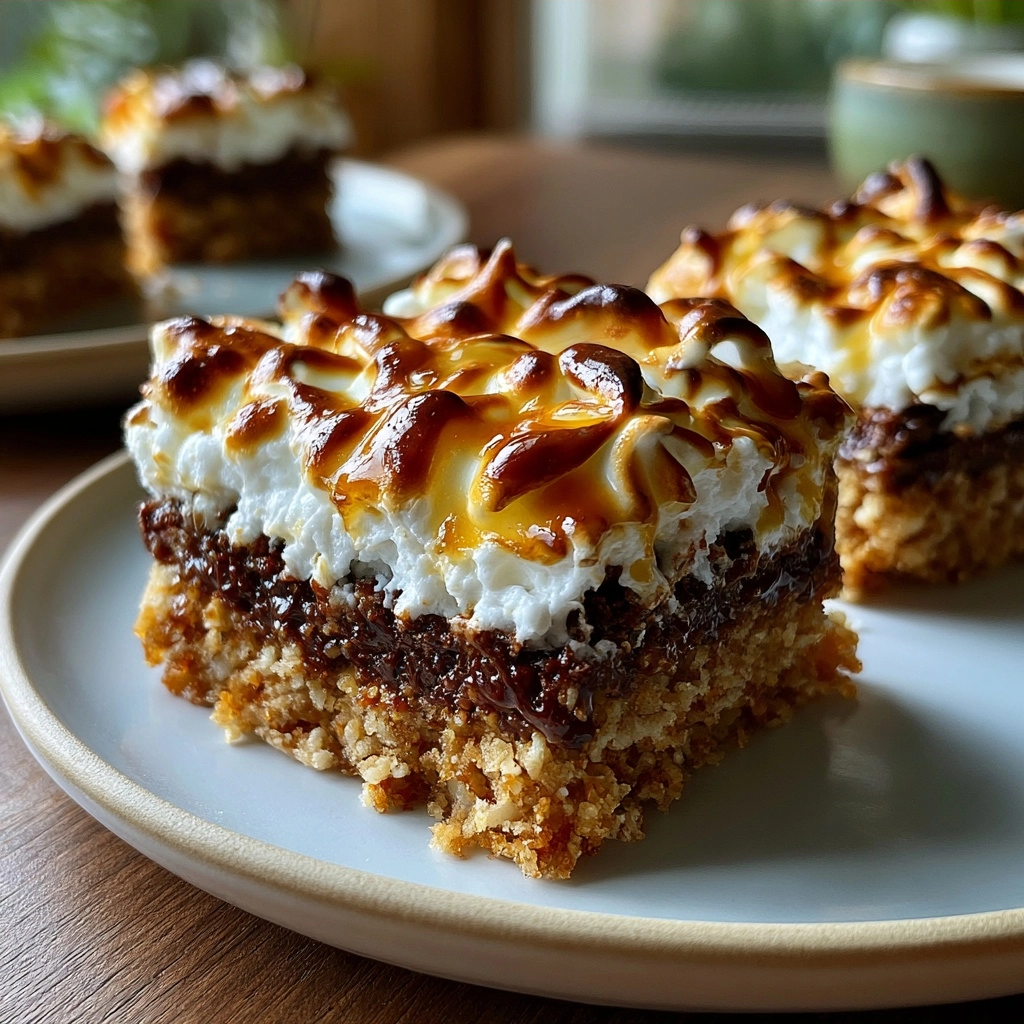
These no-bake s’mores bars deliver classic campfire flavor with layers of crumbly graham cracker base, gooey marshmallows, and melted chocolate. A simple, mess-free dessert perfect for gatherings or on-the-go sweetness.
- Prep Time: 10
- Cook Time: 5
- Total Time: 15
- Yield: 12-16 bars
- Category: recipe index
- Method: No-Bake
- Cuisine: American
- Diet: Vegetarian
Ingredients
12-15 full sheets graham crackers (honey or cinnamon flavor)
1/2 cup (1 stick) unsalted butter
4 cups mini marshmallows
2 cups semi-sweet chocolate chips
1 teaspoon vanilla extract (optional)
Instructions
Line a 9×13-inch pan with parchment paper. Crush graham crackers into coarse crumbs.
Melt butter in a saucepan, then mix with graham cracker crumbs until evenly moistened.
Press crumb mixture into the pan using a flat glass until compacted.
Melt chocolate chips in a double boiler or microwave (30-second intervals). Stir in vanilla extract.
Pour half the chocolate over the base, spread evenly with a spatula. Reserve remaining chocolate.
Microwave marshmallows for 45 seconds until melty but not browned. Spread over chocolate layer.
Drizzle remaining chocolate over the top. Refrigerate for 1 hour before cutting into 12-16 bars.
Notes
Jumbo marshmallows require 1-2 minutes microwave time. Store in an airtight container for up to 1 week. For easier cutting, chill bars for 30 minutes before slicing.