Short, Catchy Intro
So you’re craving warm, garlicky bread… but you’re also not trying to start a whole “knead for 20 minutes and proof for 2 hours” situation, huh? Same. 😅
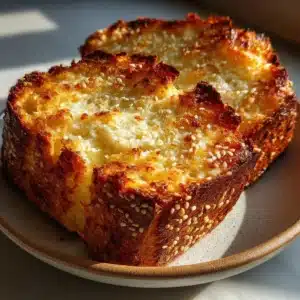
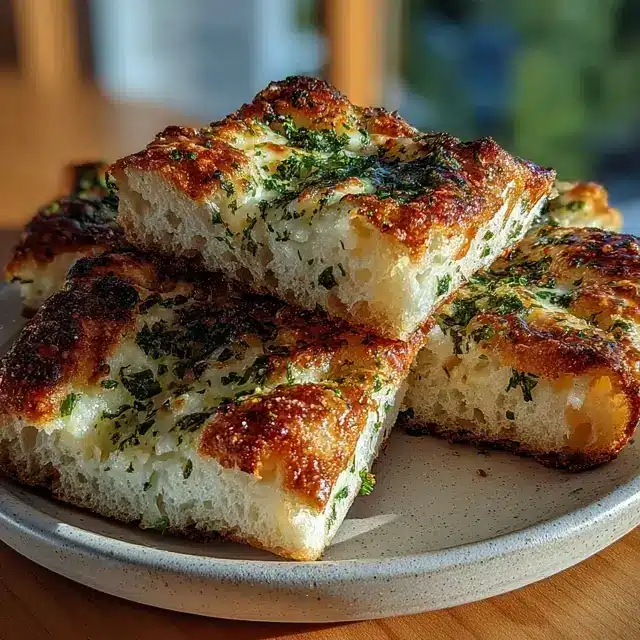
These 2-Ingredient Cottage Cheese Garlic Herb Bread Squares are basically the snack version of “I want bakery vibes with zero bakery effort.” They bake into a golden, fluffy slab, you slice them into squares, and suddenly you’re the person who “makes bread.” Love that for you.
Why This Recipe is Awesome
Let’s talk about why this recipe deserves a spot in your “I’m hungry and impatient” folder:
- Two ingredients. That’s it. No yeast. No fancy flour rituals. No emotional support stand mixer.
- It’s fast. Mix, bake, slice, inhale. The whole thing feels suspiciously easy.
- It’s flexible. You can go heavy on garlic, switch herbs, make it cheesy… it’s basically bread that doesn’t judge you.
- It’s beginner-proof. IMO, if you can stir things in a bowl, you can make this. Yes, even on a lazy day.
Also: cottage cheese in bread sounds weird until you taste it. Then you’re like, “Oh… I get it now.”
Ingredients You’ll Need
- 1 cup cottage cheese (full-fat tastes best, but use what you’ve got)
- 1 1/2 cups self-rising flour (the “bread shortcut” flour that does the work for you)
Optional (but highly recommended for the garlic herb vibe):
- 1–2 tsp garlic powder (or more if you want “don’t talk to me” garlic levels)
- 1–2 tsp Italian seasoning (or dried oregano + basil)
- 1/2 tsp salt (skip if your cottage cheese is super salty)
- 1–2 tbsp grated parmesan (because parmesan makes everything act right)
- 1 tbsp olive oil or melted butter for brushing (this is the glow-up step)
Note: The base recipe is truly 2 ingredients. The seasonings are the “personality.”
Step-by-Step Instructions
- Preheat your oven to 375°F (190°C).
Line an 8×8-inch pan with parchment paper or lightly grease it. Yes, preheat. Warm ovens make good bread. Cold ovens make sadness. - Smooth the cottage cheese (optional, but nice).
If you want a more “classic bread” texture, blend the cottage cheese for 20–30 seconds until smooth. If you don’t care and you like little curds, skip it. You’re the boss. - Mix the dough.
Add the cottage cheese and self-rising flour to a bowl. Stir until a shaggy dough forms. It’ll look a little sticky at first—keep going. - Add the flavor (optional, but… do it).
Stir in garlic powder, Italian seasoning, parmesan, and a pinch of salt if needed. This is where it stops being “plain bread” and starts being “dangerously snackable.” - Press it into the pan.
Transfer dough to your prepared pan. Use slightly oiled hands or a spatula to press it evenly into the corners. Aim for a flat top so it bakes evenly. - Score it into squares (pro move).
Lightly score the top into 9 or 12 squares with a knife. This makes slicing easier later and makes you look like you planned ahead. - Bake for 22–28 minutes.
Bake until the top turns golden and the edges look set. A toothpick should come out mostly clean (a few crumbs are fine). - Brush + cool + slice.
Brush the top with olive oil or melted butter while it’s hot. Sprinkle extra herbs/parmesan if you’re feeling fancy. Let it cool 10 minutes, then slice along your score lines.
Key tip: If you want extra golden edges, bake 2–3 minutes longer. Just don’t turn it into a cracker situation.
Common Mistakes to Avoid
- Skipping the preheat. Rookie mistake. Your bread wants consistent heat, not “warming up slowly like it’s Monday.”
- Using regular flour and pretending it’s self-rising. Unless you add baking powder + salt, it won’t rise right. The squares will come out… emotionally flat.
- Overmixing the dough. Stir until combined, then stop. Overmixing can make it tough. Bread squares should be soft, not “jaw workout.”
- Not pressing it evenly. Thin spots bake too fast, thick spots stay doughy. Flatten it like you mean it.
- Slicing immediately. Hot bread is fragile. Give it 10 minutes to chill so it doesn’t crumble into chaos.
Alternatives & Substitutions
Want to remix it? Here are easy swaps that won’t ruin your day:
- No self-rising flour? Use all-purpose flour + add 1 1/2 tsp baking powder + 1/2 tsp salt. Done.
- Want it extra cheesy? Mix in shredded mozzarella or cheddar. Just don’t go wild or it’ll get heavy.
- Fresh garlic instead of powder? Yes, but keep it small: 1–2 minced cloves. Fresh garlic can burn on top, so mix it in well.
- Herb choices? Italian seasoning is easy, but rosemary + thyme is elite for cozy vibes. Dill also works if you want a tangy snack bread moment.
- Spicy version? Add crushed red pepper flakes. Not too much unless you want your bread to fight back.
FYI: This recipe handles “creative energy” really well. You can make it your own without breaking it.
Print2-Ingredient Cottage Cheese Garlic Herb Bread Squares

These 2-Ingredient Cottage Cheese Garlic Herb Bread Squares are soft, fluffy, and packed with garlicky herb flavor. Made with just cottage cheese and self-rising flour, this quick bread bakes into a golden slab that slices into perfect snackable squares. No yeast, no kneading, and ready in under 30 minutes.
- Prep Time: 5 minutes
- Cook Time: 25 minutes
- Total Time: 30 minutes
- Yield: 9 squares
- Category: Bread
- Method: Baking
- Cuisine: American
- Diet: Vegetarian
Ingredients
1 cup cottage cheese (blended smooth)
1½ cups self-rising flour
1–2 tsp garlic powder
1 tsp Italian seasoning
½ tsp salt (optional)
1–2 tbsp grated parmesan cheese (optional)
1 tbsp olive oil or melted butter for brushing
Instructions
1. Preheat oven to 375°F (190°C) and line an 8×8 baking pan with parchment paper or lightly grease it.
2. Blend cottage cheese until smooth for a softer bread texture.
3. In a mixing bowl combine cottage cheese and self-rising flour until a soft dough forms.
4. Stir in garlic powder, Italian seasoning, and parmesan if using.
5. Transfer dough to prepared pan and press evenly into the corners.
6. Lightly score the dough into 9 or 12 squares with a knife.
7. Bake for 22–28 minutes until golden on top and cooked through.
8. Brush with olive oil or melted butter and sprinkle extra herbs before slicing.
Notes
Blend cottage cheese for a smoother texture but it can be used unblended.
Do not overmix the dough or the bread may become dense.
Bake slightly longer for crispier edges.
Great served warm with soup, salad, or marinara for dipping.
FAQ (Frequently Asked Questions)
1) Can I use low-fat cottage cheese?
Yep. It still works. Full-fat tastes richer, but low-fat will bake fine. If it seems watery, just add 1–2 extra tablespoons of flour while mixing.
2) Do I have to blend the cottage cheese?
Nope. Blending gives a smoother texture, but leaving it chunky is totally okay. It’s bread, not a science fair project.
3) Can I make this without an oven?
This one really wants an oven for the best rise and texture. You can try an air fryer (in a small pan) at 350°F (175°C), but keep an eye on it so the top doesn’t brown too fast.
4) How do I know it’s done?
The top should be golden and the edges should look set. A toothpick should come out mostly clean. If the center jiggles like it’s unsure of itself, bake 3–5 more minutes.
5) Can I freeze these bread squares?
Absolutely. Cool completely, slice, and freeze in a bag. Reheat in the toaster oven or oven so they stay crispy on the outside. Microwave works too… but it can make them a bit soft. Your call.
6) What should I serve with it?
Soup, salad, eggs, or just your hands—no judgment. It’s also ridiculous with marinara for dipping. Like little garlic bread bites, but easier.
7) Can I add eggs to make it “more bread”?
You can, but then it’s not the same recipe anymore. If you want a more muffin-like texture, add 1 egg and reduce the cottage cheese slightly (about 3/4 cup). It’ll be softer and more cakey.
Final Thoughts
These Cottage Cheese Garlic Herb Bread Squares are the kind of recipe that makes you feel weirdly accomplished for barely trying. Two ingredients, one bowl, and suddenly your kitchen smells like a garlic bread dream.
Make a batch, slice it up, and keep it around for snacking, dipping, or showing off like, “Oh this? Yeah, I just whipped up some bread.” 😌 Now go impress someone—or yourself—with your new culinary skills. You’ve earned it!